WebMux supports
client side SSL verification. This is different from regular SSL termination by
also installing private SSL certificates on each client computer browser. When
that browser visits the web site behind WebMux, WebMux will ask the client
computer to send its public key. Based on its configuration, WebMux can reject
any visitor not having valid private SSL certificate issued by the system
administrator, or allow that visitor go forward to the server alone with
additional MIME tag to identify who the visitor is based on the information
from within the private SSL certificate installed on the browsers.
WebMuxs client
side SSL verification uses a privately generated SSL root and each SSL
certificate is privately signed by that root. This has advantage allowing
system administrator generating new root and SSL certificates easily. Since no
third party involved in signing those SSL certificate, its security is higher
than those signed by the public signing agencies without any additional cost.
This article
discuss how to make the SSL root, how to generate the SSL certificate and
install it in the client side computer, and how to configure the WebMux to
enable the client side SSL verification.
1. Create
the Certificate Authority using OpenSSL. This step will produce ca.key and
ca.crt which will be used for future steps. If you have different sites and
want to use different private root and certificate, please use different name
for their output, for example, ca1.key for first site and ca2.key for second
site, also the ca.csr and ca.crt all need to follow the same naming convention
to identify them.
a. Generate
a private key:
openssl
genrsa -out ca.key 1024
b. Generate
a certificate request:
openssl req
-new -key ca.key -out ca.csr
Fill in all the
proper fields.
c. Self-sign
the certificate request:
openssl
x509 -req -days 365 -in ca.csr -signkey ca.key -out ca.crt
2. Import
the CA root certificate into the Webmux. This step will add the private SSL root
into WebMux. Please note this root and key are different from the private key
and SSL certificate for the SSL termination, even they are used in the same SSL
key slot in WebMux. The SSL certificate signed by outside CA are for SSL
termination. The private SSL root here is for verifying visiting clients.
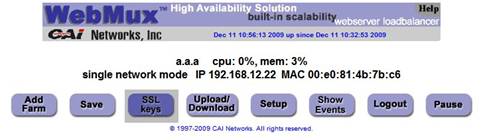
a. Click
on the SSL Keys button to go to the SSL Management page:
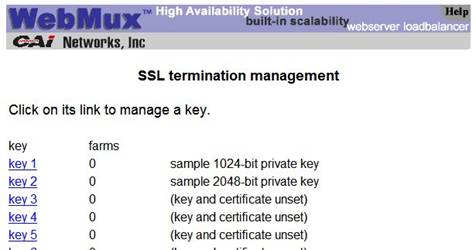
b. Select
an unused key slot (key 3, for example):
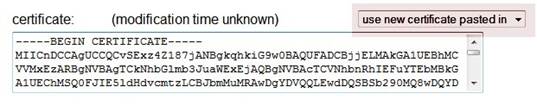
c. Open
the ca.crt file created in step 1 as a text file.
d. Copy
and paste the text in to the CA certificate text box. Be sure to select use
new CA certificate pasted in and add the line CAFILE level 2 on the very top.
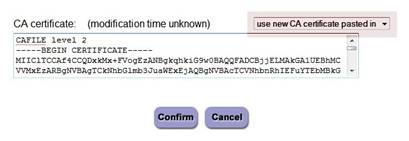
e. Click
the confirm button.
3. Create
a private key and generate a certificate request. This step will generate the
outside CA signed SSL CSR. If your site is www.mydomain.com,
this certificate is for visitor browser can visit your site securly at
https://www.mydomain.com
a. Using
OpenSSL:
i.
Create the private key:
openssl
genrsa -out webmux.key 1024
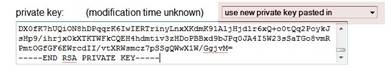
ii.
Open the webmux.key file and copy and paste into the private key text
box of the key slot you imported the CA certificate. Be sure to select use
new private key pasted in.
iii.
Generate a certificate request:
openssl req
-new -key webmux.key -out webmux.csr
Fill in the
appropriate fields.
iv.
Your certificate request is saved in the file webmux.csr Please send
this CSR to the outside CA for signed with their CA root. Because all major CA
has their root already build-in popular browser, signed by those outside CA
would avoid the warning message from browsers. If your CSR is signed by
outside CA, you can skip step 4 and continue on step 5. If you plan to totally
use privately signed SSL certificates, then you continue to step 4.
4. Self-sign
the certificate request and import the certificate into the WebMux.
a. Use
openssl to sign the certificate request with the CA using the ca.key and ca.crt
created in step 1:
openssl
x509 -req -days 365 -CA ca.crt -CAkey ca.key \
-CAcreateserial-in
webmux.csr -out webmux.crt
b. Open
webmux.crt as a text file and copy and paste into the certificate text box:
c. Click
the Confirm button.
Now your WebMux
is ready for SSL termination as well as client side SSL verification. From next
step, you will generate the SSL certificate for each client computer.
5. Generate
the client key and certificate request. From this step on, you will generate
the SSL certificate that users installing into their computer. Each client SSL
certificate should be different, with user name and unit name different for
WebMux and your own server apps to identify the visitors. If you have 200
employees, you may use combination of their name and user ID as the file name
to identify the key, csr, and certificate. For exmaple, mike5312.key, mike5312.csr
and mike5312.crt to identify Mike at extension 5313.
a. Generate
the client key using OpenSSL:
openssl
genrsa -out client.key 1024
b. Generate
the client certificate request:
openssl req
-new -key client.key -out client.csr
Please make sure to have unique information in each field when generting
CSR, so that WebMux can identify the visitor and pass that inforamtion to your
server apps.
6. Sign
the certificate request:
openssl
x509 -req -days 365 -CA ca.crt -CAkey ca.key -CAcreateserial \
-in
client.csr -out client.crt
Here ca.crt is from step one of this
document. That is the private root of the SSL client verification.
7. Convert
client certificate to PKCS#12 format:
a. Using
the client.key created in step 5a and the client.crt created in step 6:
openssl
pkcs12 -export -clcerts -in client.crt -inkey client.key \
-out
client.p12
8. Import
the Client Certificate.
a. For
Firefox:
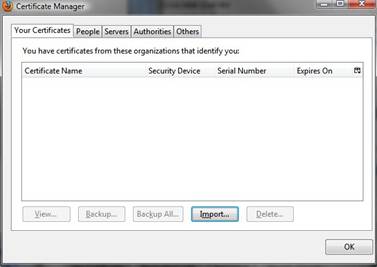
i.
Go back to the Certificate Manager and click on the Your Certificates
tab. Click on Import:
ii.
Select the client.p12 file created in step 7:
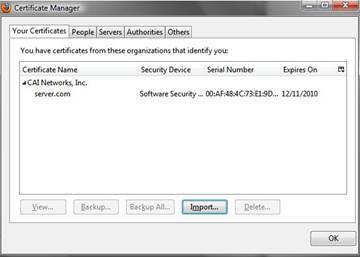
iii.
Click the OK button.
b. For
Internet Explorer:
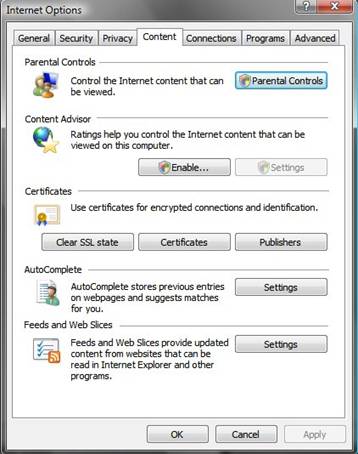
i.
Go to the Tools menu and select Internet Options.
ii.
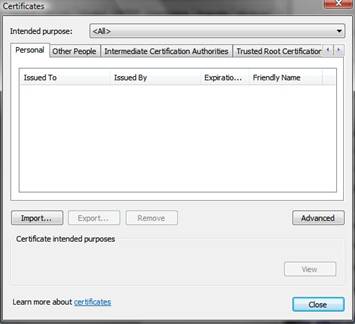
Click on the Content Tab, then click on the Certificates button:
iii.
In the Certificates windows, click on the Personal tab:
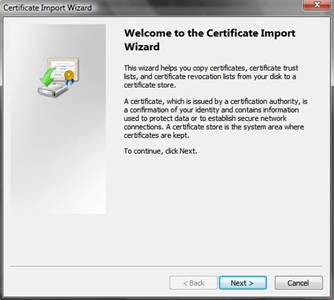
iv.
Click on the Import button. You will see this screen. Click the Next
button:
v.
Click the Browse button:
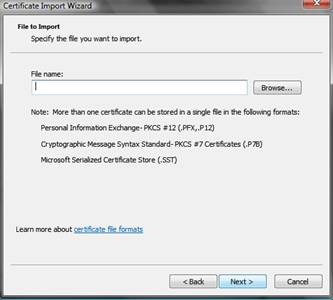
vi.
Be sure to select the Personal Information Exchange (p12) format:
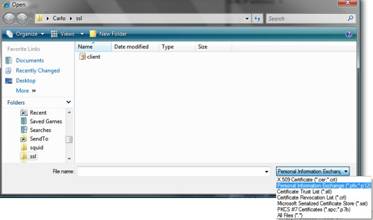
vii.
Enter the password you created at 7a:
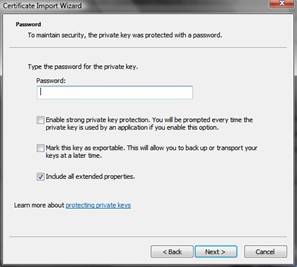
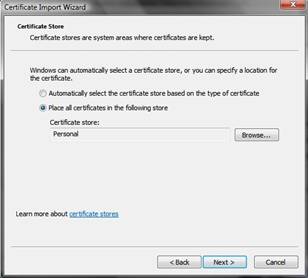
viii.
Click the Next button:
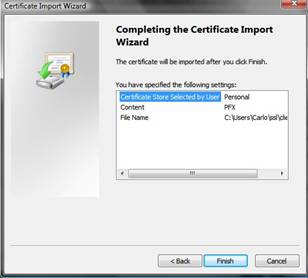
ix.
Click the Finish button:
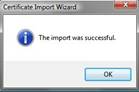
x.
The Certificate has been imported:
9. To
enable client side certificate authentication on the WebMux:
a. Create
a farm with SSL termination using the key slot that has the CA certificate
imported.
b. Select
tag SSL-terminated HTTP requests.
10. Select client side SSL
verification level:
a. In
step 2 above, we have comment CAFILE level 2, you can change it to 0, 1, or
2. With level 0, the client side checking is disabled. With level 1, the client
is checked. However, if client failed, WebMux will still allow the client
connecting to the server with a MIME header tag to notify the server such
checking failed for the client. For level 2, client failed SSL verification
will be dropped by WebMux.
b. For
level 1 or 2, WebMux will pass a MIME tag "X-WebMux-SSL-Client" with
all the contens of the client certificate. If the client does not have valid
client side SSL certificate, WebMux will pass "X-WebMux-SSL-Client= NO
CLIENT CERTIFICATE" to the server.
c. Server
app can based on this MIME tag to determine how its app handle this client:
direct to the real app, send to a register screen, provide a warning page, or
send it to a fake site.
